How to Setup JNHL AVM using RB941
By jesienazareth@jnhl / January 17, 2022 / No Comments
JNHL AVM
INSTALLATION AND CONFIGURATION
Please follow the steps to build your JNHL AVM Lan base / wireless using Nodemcu / ESP8266.
THIS GUIDE IS FOR MIKROTIK RB941 ROUTER
DRIVER INSTALLATION
Nodemcu Driver Installation
Download the NodeMCU-PyFlasher-4.0-x64.exe and CH340 driver CH340 DRIVER
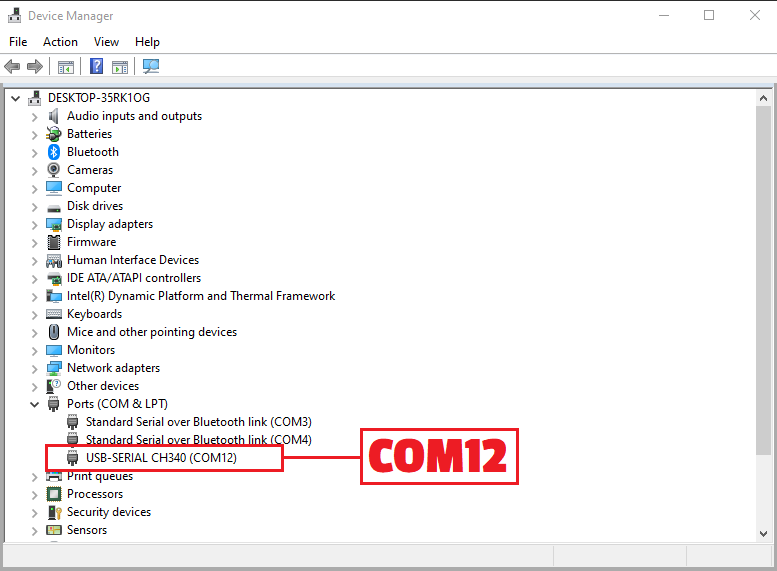
- Connect your Nodemcu to your computer using USB cable and install the driver. If you already install check the COM port number for CH340, to check the COM port open Device Manager. Note that the COM port # is different to what you see in the picture below, use your COM port # base in your CH340.

FLASHING
Flashing JNHL AVM BIN
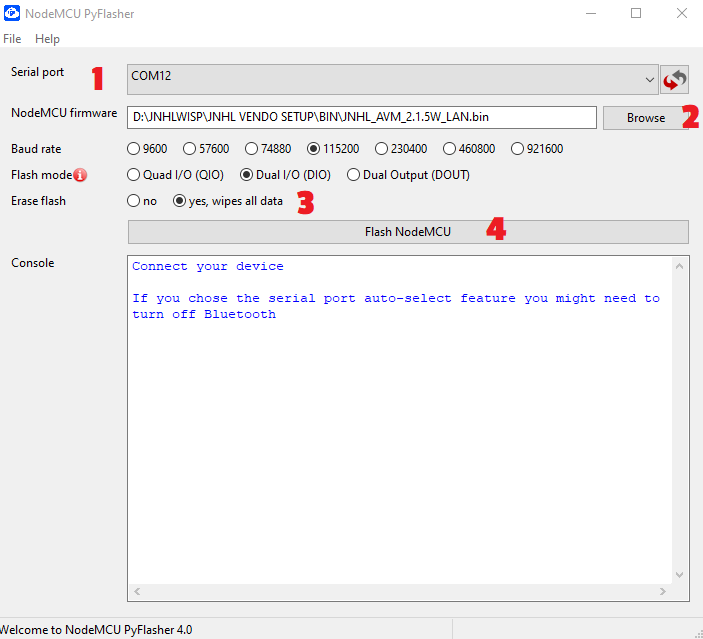
- Select serial port # mine is com12.
- Browse and locate the JNHL bin file and select Lan base or Wireless bin.
- Select yes, wipe all data.
- Click Flash NodeMCU Button
- Wait for the message Firmware successfully flash.
Now you finish flashing the NodeMCU and its now ready to be installed to your Customer board or DIY build.
Download the file here

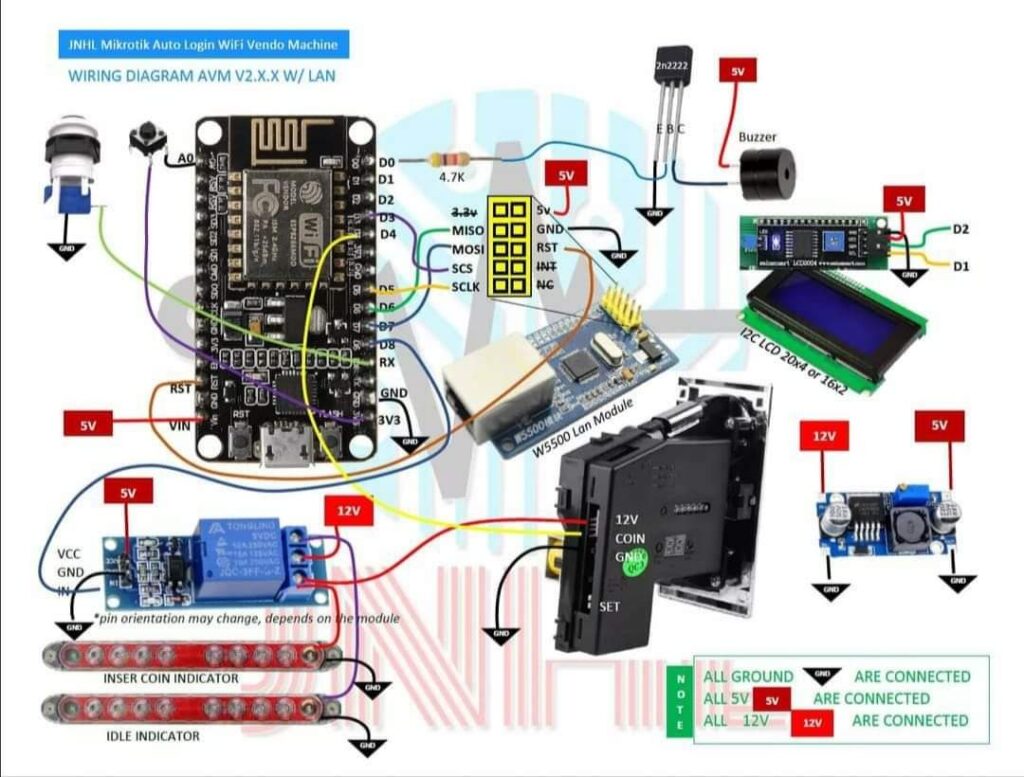
WIRING DIAGRAM
LAN WIRING DIAGRAM

LICENSE
JNHL AVM LICENSE
ACTIVATE SOFTWARE FOR FULL ACESS
₱
500
LIFETIME
-
1PCS LICENSE
BUY
VISIT OUR FACEBOOK PAGE OR CHAT WITH US.
Popular
RESTORE BACKUP FILE
PREMADE RB941 HOTSPOT CONFIGURATION
- Download the RB941 PREMADE BACKUP/ PACKAGE or you can download the rcs file
- Watch the video on how you can easily upload/restore the hotspot configuration for standalone setup.
- After you finish this step you’ll be able to use automatically the newly flash nodeMCU this config is default for JNHL AVM default configuration.
FINAL SETUP
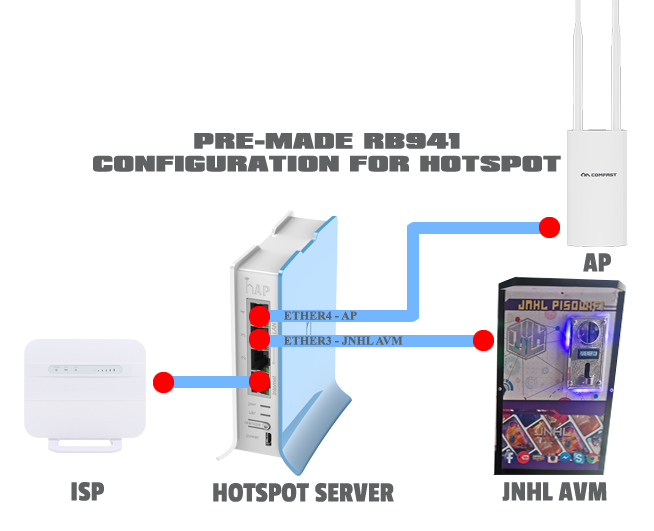
FINAL SETUP FOR JNHL AVM + RB941
CONFIGURATION INFO
- Mikrotik Router default Winbox access
- User: admin
- Password: (No password)
- Built in Wireless SSID: PISOWIFI
- Vendo Default IP / Admin panel
- 10.0.0.2
- JNHL AVM Config mode default IP / admin panel
- 10.10.10.1
- JNHL AVM default SSID
- VENDO SETUP LAN
- JNHL AVM Mikrotik Credential / Vendo admin access
- User: jnhl
- Password: jnhl
- Enjoy using JNHL AVM SOFTWARE
NETWORK DIAGRAM

